Slide 1 of 4
Slide 2 of 4
Slide 4 of 4
Your Browser Is No Longer Supported. Please use an alternative browser to improve your experience and security.
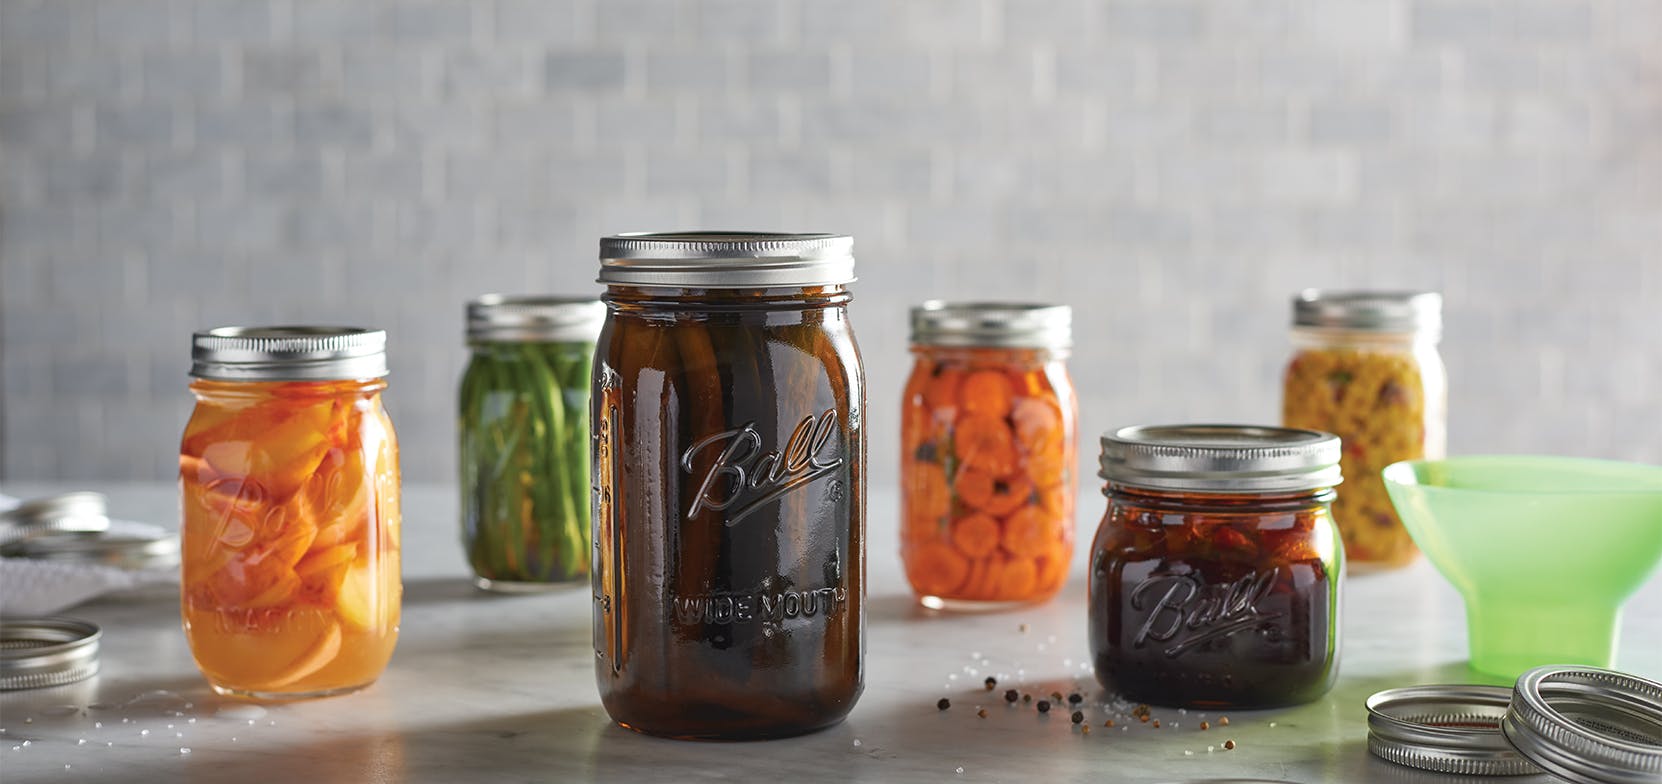
Canning low-acid foods like meats, poultry, seafood, and most vegetables (except tomatoes) requires special attention. These foods are such a natural part of meal planning that preserving them in canning jars ensures an economical and well-balanced diet throughout the year. However, because these foods lack the level of acidity needed to prevent spoilage, low-acid foods MUST be processed at a temperature of 240°F for the recipe-established time. Pressure canning is the only way to fresh preserve at those temperature levels.
TIP: Recipes that combine high-acid foods, such as tomatoes, with low-acid foods, such as vegetables or meats, are considered low-acid foods.
Follow this step-by-step guide to safely learn how to pressure can and effectively preserve your low-acid foods:
Review Ball® recipe and instructions. Follow guidelines for preparation, jar size, preserving method, and processing time.
TIP: Check jars, lids, and bands for proper functioning. Jars with nicks, cracks, uneven rims, or sharp edges may prevent sealing or cause jar breakage. The underside of lids should not have scratches or uneven or incomplete sealing compound as this may prevent sealing. Bands should fit on jars. Wash all in hot, soapy water and dry well.
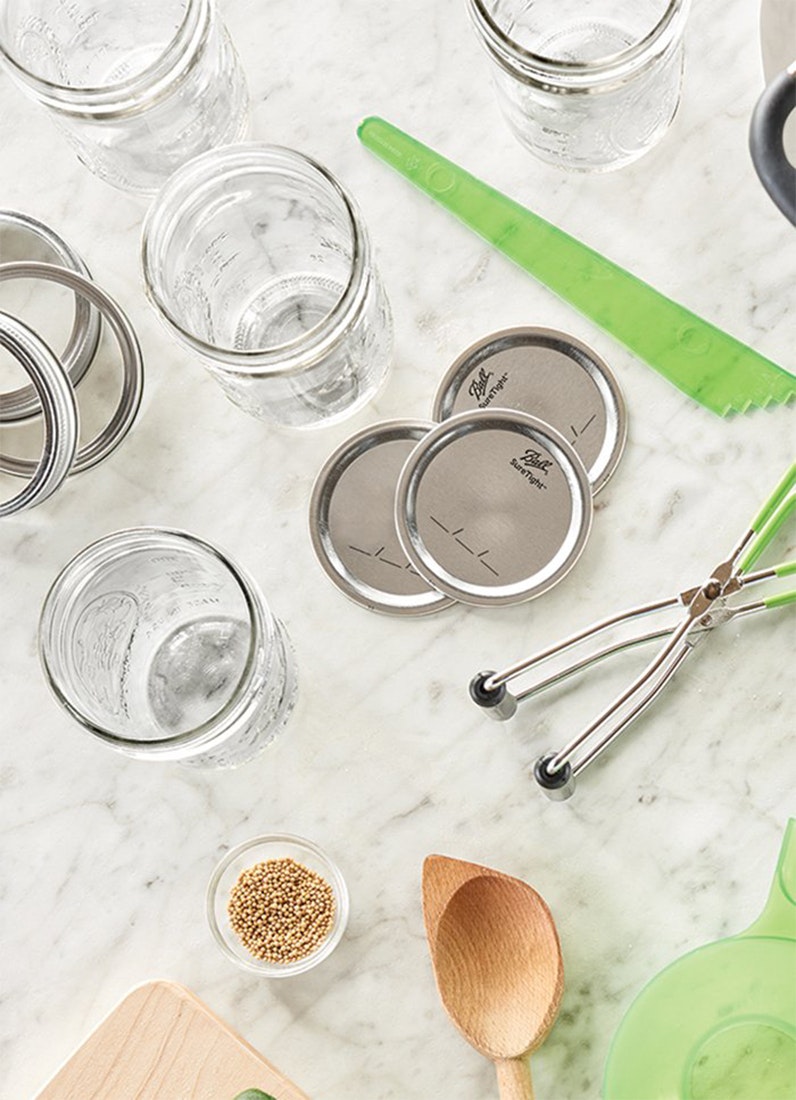
1. Preheat your Ball® canning jars in hot (180°F) water. Keeping jars for canning hot prevents them from breaking when filled with hot food. Leave lids and bands at room temperature for easy handling (see tip at bottom).
2. Add 2-3 inches of water to your pressure canner. Bring to a simmer (180°F).
3. Prepare the desired tested low-acid preserving recipe.
4. Use a Jar Lifter (found in our Fresh Preserving Starter Kit) to remove the pre-heated jar. Fill jar one at a time with prepared food using a Jar Funnel, leaving headspace recommended in the recipe. Remove air bubbles, if stated in the recipe, by sliding the Bubble Remover & Headspace Tool or rubber spatula between the jar and food to release trapped air. Repeat around jar 2-3 times.
5. Wipe the rim and threads of the canning mason jar using a clean, damp cloth to remove any food residue. Center lid on the jar, allowing the sealing compound to contact the jar rim. Apply band and adjust until fit is fingertip-tight. Place jar in canner. Repeat steps 4 and 5 until all jars are filled. Ensure that water level is 2-3 inches high (or per recommended in manufacturer’s manual).
6. Lock the pressure canner lid in place, leaving vent pipe open. Adjust heat to medium-high. Allow steam to escape through vent pipe for 10 minutes or until steam forms a constant flow to ensure there is no air (only steam) left in the canner. Close vent using weight or method described for your canner. Monitor and adjust heat to achieve the recommended pressure.
7. Maintain the recommended canning pressure for the time indicated in tested preserving recipe, adjusting for altitude (see altitude chart). Turn off heat. Let canner stand undisturbed (do not remove the weighted gauge) until pressure returns to zero. Wait 10 minutes, remove weight and unlock the lid, tilting away from yourself. Allow canning jars to cool for an additional 10 minutes.
8. Move jars from pressure canner and set upright on a towel. This will prevent jar breakage that can occur from temperature differences. Leave jars undisturbed for 12 to 24 hours. DO NOT tighten bands as this may interfere with the sealing process.
9. Inspect lids for seals. There should be no flex when the center is pressed. Remove the bands and attempt to lift lids off with your fingertips. Properly sealed lids will remain attached. If a lid fails to seal within 24 hours, immediately refrigerate the product. Clean canning jars and lids, label and store in a cool, dry, dark place for up 18 months when using SureTight Lids according to our instructions for Food Preservation.
TIP: Preheating Ball® lids is not advised. The sealing compound used for our home canning lids performs better at room temperature than it does pre-heated in simmering water (180°F). Simply wash lids in hot, soapy water, dry, and set aside until needed. Preheating can lead to less vacuum being achieved during water bath canning, and to buckle failures during pressure canning.
Pressure canning is a rewarding and reliable method for preserving your foodie favorites. By following these nine steps on how to use a pressure can successfully, you can ensure the best canning results every time. From preparing your canning jars and canning recipes to filing them with your foodie favorites, the process is made simple with Ball® Mason Jars and tools--- explore our wide variety of canning accessories that make each recipe possible! Always remember to pay careful attention to removing air bubbles or wiping jar rims to guarantee a proper seal and extended shelf life for your canning creations. Following the recommended processing times of your pressure canning recipes and considering altitude adjustments will reward you with flavorful preserves. Once the canning process is complete, the set and flex test provides the satisfaction of knowing that your Ball® mason jars are properly sealed and ready to be stored. So embark on your canning journey, confidently preserving your homemade delights today.